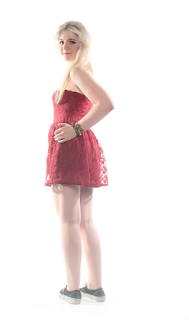
For this image I noticed that there were a few imperfection even though I had taken this image in the studio and so I decided to open this image up into Photoshop.
First, I used the crop tool to get rid of the floor that was showing in the image.
Then, I used the quick selection tool to select the background for the image and the reason why I done this is so that I can change the background from this dirty shadow background to a clean white background. When using the quick selection tool I like to use the Refine Edge tool so that the edges of my images don't have a harsh edge.
Next, I used the clone tool to get rid of the imperfections in the image and I used the clone tool to get rid of the black material that was showing underneath the model's arm. I also used the clone tool to make the model's shoes look cleaner.
Looking at the image I thought that the image looked too dark and so I used the Levels Tool (cmd+l) to change the brightness of the image. I looked at the model shoes after I had used the clone tool and thought that I could still improve the quality of how the shoes looked and so used the Levels Tool to lighten the shoes.

No comments:
Post a Comment